Roofing - Plan B or is it Plan A??!!?
For those who followed my progress on the garden shed, you will know that I got the plans from Miniature Collector.

The plans called for a copper roof with a green patina. I purchased all the copper for the roof, but it's the one thing that I have avoided doing. It was very intimidating, and something I have never attempted. I always find when I reach blocks such as this I tend to put projects on the back burner and this is definitely what happened here.
Then I was inspired by a metal roof I had saw on another project. Even though I didn't have exact instructions, I had enough pictures that I felt I could duplicate it. I thought I would share how I attempted it with all of you in case you want to try a similar roof on one of your projects.
I started with a roll of corrugated cardboard that I picked up at Michael's. I cut it into pieces that were approximately 2"x 3" and painted them with a Aluminum enamel paint. It took a couple of bottles and a couple of coats, and my craft room had a very overwhelming odor by the end of it. Thankfully my scents-sensitive husband was away on a golfing trip to South Carolina while I worked on this part. Hopefully the fumes will have subsided before he returns!


I knew once I applied the pieces to the roof, there was a possibility that the roof below may be visible at times, so I decided to paint the roof black so the wood wouldn't stand out. I removed the shed from the landscape during this stage so that I wouldn't drip black paint on the grass or flowers.

There are a couple of sites that also have instructions for creating a rusty metal roof that you also may enjoy. Even though I didn't use either site's instructions directly, there were a lot of learnings I took from both. Greenleaf has this roof instructions using tin foil.
The V-spot has instructions for making peeling paint spots. I did use part of these instructions, but rather than starting with a rusty coat first, I started with an aluminum coat first, then rust and then aluminum again. I did it this way because I was working with cardboard and I feared that when I removed the salt I didn't want the cardboard exposed. I thought the more layers I had under the salt, the better for the final product.
I painted lots and lots of pieces, first with aluminum.....

The with a rust shade of enamel paint

Then I put a water wash on the rust areas and added the salt in spots that I hoped would be natural.

I waited a day for the salt to dry.

Then I painted the aluminum colour over the dried salt spots


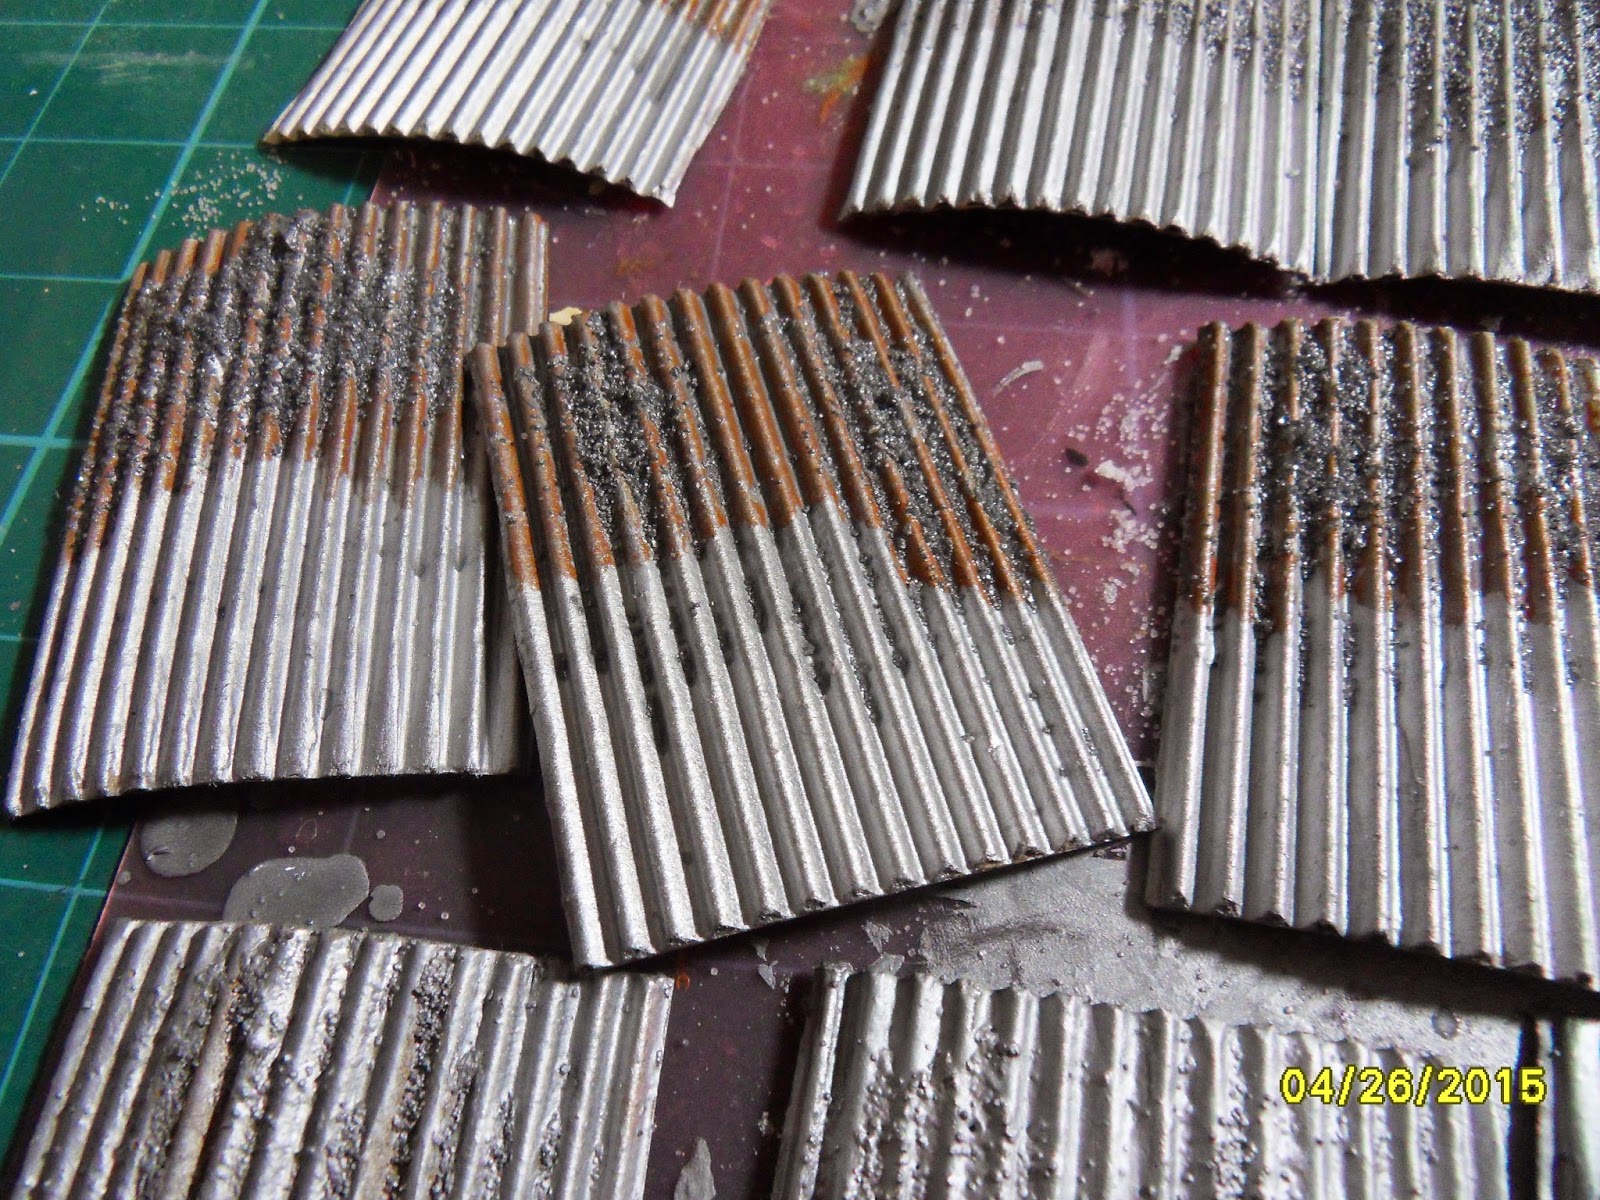
Then I attempted to remove the salt spots has per the instructions I had read. I learned a very valuable lesson. This technique DOES NOT WORK WITH ENAMEL PAINT
I kept all the cardboard pieces. They actually look a lot like corroded metal, so they may be useful for a future project. So if you are attempting this project, I would suggest using acrylic. If you're looking for a corroded look, salt and enamel work great!!
So now I have to decide if I want to cut new cardboard strips and start all over again with acrylic paint, or if I want to go back to Plan A and actually do the copper roof that was called for in the plans. I reread the plans, they actually offered up cedar shingles as Plan B, but I've done that before, I want to try something new.
Looks like a have some thinking to do. Doesn't it look wonderful when I share my failures as well as my accomplishments!!
By the way....school's over for another year!! I have time for miniatures!!!
Until the next time......
Wanda


I LOVE THIS POST Wanda, and I Thank You Very Much for taking the time to put it together! I have previously seen the salt method used for making mini Polyclay Breads which I viewed on a Russian blog. This technique on corrugated cardboard is something new to me. Brae at Otterine blog has just demonstrated another version of salt rust on an old abandoned bathtub that she is building a exterior scene for but the tub is plastic so it could be immersed in water. I think that I would still use the corroded metal sheets that you have made and convert the salt into moss, because they look really authentic to me and I would hate for you to consider them a write-off, because they are they 100% unique and I LOVE THEM!!!! :D
ReplyDeleteThanks Elizabeth, Brae at Otterine Blog sent me an email and referred me to another roof she had done on the Barslow Ranch project. Wish I had remembered this before I started. I loved that roof, but I had been trying to do the roof from the Greenleaf site using cardboard, rather than tinfoil, but it didn't work out. I have been following Brae's work on the tub. Wasn't it fabulous. I have gone back and started the original copper roof. You can see more of that in my next post. Thanks again for your comments, they are so appreciated.
ReplyDelete